Thursday, March 24, 2011

Backpacking Tents

Between me and the troop, we've been through a few backpacking tents.  You know they have to be pretty durable to stand up to the abuse they get from scouts, but they also need to be lightweight.  Then there's the size.  What size is best?  How big is too big?  Will it really fit the # of people that it says it will?  Well, I've got a few ideas about backpacking tents that I'll share, but first, let's look at a few tents:

Our Scouts Backpacking tent.  3-4 Man, and just over 8 pounds
A small, 2-man tent made by Eureka, the Zeus 2
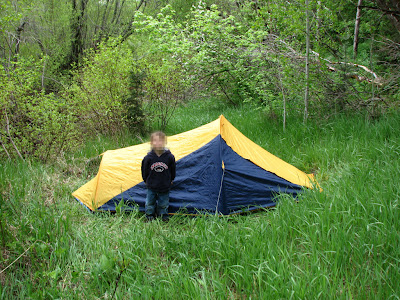
Small Tent I got from Smiths Marketplace for around $20
The one in the front is an Ozark Trail tent from Walmart ($30).  It sets up quick, and has been good for what I've needed it for, but it has some clear panels on the rainfly so you can see the stars that gets brittle and cracks when it's used in freezing temperatures.
The one in the back is a Coleman 8-man tent.  Way too big for backpacking of course, but a great car camping tent.  I love the "D" door with it's pole in the door that makes it act like a hinge.  That way you can go in and out of the tent without wearing out the zipper.

SIZE

For scouts I like to get 3-4 man tents for backpacking.  Typically you can fit one less person comfortably than what it says you can fit.  So, our scout backpacking tents that are sized for 4 people, actually fit 3 people pretty well.  We have stuffed 4 scouts in there at times, but they weren't too excited about it.
Interestingly enough, a 4 man tent for the scouts, fits 2 adult leaders pretty good.  It's kind of weird, but adults don't like to be squished in together in tents.  They like a little more room.  So, the Ozark Trails tent that is pictured above is pretty good size for 2 adults.

WEIGHT

The lightest backpacking tent I have is the Eureka 2-man tent in the photo above.  It doesn't have a rain fly - the walls/roof of the tent act as the rain fly.  Since it doesn't have a rain fly, it weighs in just under 4 pounds.  It says it's 2-man, but that's pretty tight for 2 adults.  I guess you could squeeze 2 adults in there, but it's more for 1 adult, or a father and son.
The Scout backpacking tent in the picture above weighs about 8 pounds.  But if you were to split that up into 3 packs (with the poles in one, the tent in one, and the rainfly and tarp in one) then you'd be just over 2.5 pounds each.  That's a pretty good weight for a good size tent.
The Ozark Trail tent from Walmart is a 4 man tent as well, and it weighs almost 10 pounds.  I've used it on a few backpacking trips, but mostly use it for car camping since it's usually shared between me and another leader so if we split the weight we're still at 5 pounds each!

WINTER USE

When the tent says 3 seasons, from what I've seen, the main differences are that a winter tent has a more full rain fly (that covers the whole tent), and winter tents don't have sections of clear stuff in the rain fly.  These sections of clear material will crack if they get frozen.  Then your rain fly doesn't keep the rain out anymore.  If you can, buy the tents that are 4 season.  They're harder to find, but worth the buy.  I have been known to take packing tape and fix holes in the clear sections of rain fly's that have been frozen and cracked, but it's best to not have to deal with it.

All in all, scouts are hard on tents.  You can train all you want, but the tents get used a lot more than the average family tents, so they last less time than that.  The most important thing is to make sure the tent is dry when you put it away.  Nobody wants to sleep in a moldy tent, and the mold will actually eat holes into the tent fabric (had that happen once, it wasn't a happy day).  After each campout, set up the tent and dry it out completely (even if you thought it was dry before).

SELF STANDING

Some tents, like the Smiths Marketplace tent shown above, need to be staked down or they collapse.  If you don't stake it down solidly, it sags, or just falls down.  This can be quite a problem when you are camping  in the sand (where the stakes may not hold) or in a rocky area or somewhere with lots of roots (where you can't get the stakes in the ground).  If possible, I try to get tents that are self standing.  I still stake them down to make it stronger in the wind, but I want the tent to hold up even if I don't stake it.  That's just a personal preference, but it's what I try to do.


CONDENSATION

One problem I have not personally experienced, but someone I lent my Eureka tent to has, is problems with condensation on the inside of the tent.  I would have thought that with the air vents on either side of the tent, plus the large vestibule with a vented door, that you would have enough ventilation that you wouldn't have condensation problems.  But, apparently if you are up high in elevation, and if it gets cold enough, you can be soaked by morning (not a happy thing if you are up in the mountains in the cold).

My brother has the same tent, but with 2 vestibules (one on each of the long sides), and he hasn't had the problem with condensation.  But it's hard to find.  It's the Eureka Zeus 2 LE.

We've never had that problem with any of the other tents, so I guess it must be the air vent on the top that it is lacking.  Since the tent is the rainfly, it doesn't have a vent on the top of the tent.  Try to get a tent with sufficient ventilation low and up high in the tent.

FOOTPRINT / GROUND TARP

Spend the extra $ to get either a cheap tarp or a custom made footprint for your tent.  It will protect the bottom of the tent and make it last longer.  It will also give your air mattress a better chance of surviving the night, adding an additional layer between the mattress and whatever is on the ground.

HAMMOCK

Another option is to sleep in a hammock.  I have written a post on Hammock camping HERE.  In essence, you're taking a hammock instead of the tent, but you still need your sleeping bag, and possibly a pad to insulate you from the cold.  Check out the link for more information.

BACK TO BACKPACKING OVERNIGHTER

Monday, March 14, 2011

Backpacking Overnighter

One of the easiest, and sometimes most rewarding trips you can go on is just an overnighter where you backpack 2-5 miles into the mountains to spend the night.  You don't need food to last a week like you would need for a week-long trip, and sometimes you can get away with less equipment as well.  One stove will get you through, or even better, use a small campfire to cook your food.  Use tents, or try doing a little minimalist camping and just use a tarp and sleeping bag.
Imagine your scouts carrying everything they needed for the night in a backpack and hiking 5 miles up a trail.  You'll find that some things they might think are important in the "city" aren't as important in the mountains.
Also, don't think you need to get the most expensive, fancy backpacks there are out there.  The bigger they are, the more weight you'll end up carrying.  The more comfortable they are, the more weight you'll carry.  Your goal should be to carry less weight.

Just a simple, square tent seems to work best for us.  We like the 3-4 man tents (and we usually put 3 in it, 4 is too tight), and aluminum poles are nice because they are more lightweight, and seem to hold up better to wind and abuse.

Click on a link below for more information on each:

Tents
Stoves
Backpacks
Sleeping Bags
Sleeping Pads
Backpacking Foods
Shoes

Backpacking Stoves

Backpacking stoves are an interesting subject where different people have completely different opinions.  So I'll offer my opinion on the pros and cons of each of the ones below, but understand that it's my opinion based on my camping experiences.  Below is a photo of the 3 backpacking stoves I have access to.  The one on the left is our troop's stove, made by Coleman.  The middle one is mine, and it's also made by Coleman.  The one on the right is a woodgas stove that burns wood instead of gas.  Each of the stoves below cost approximately the same ($50-$80, depending on where you get it).

The 3 stoves I have access to
So, the first one is a Coleman Featherlight Exponent backpacking stove.  It will run off of white gas, unleaded gas, or kerosene.  I don't picture using the kerosene feature much, but the white gas and unleaded makes it so that if you run out of white gas you can siphon gas out of a stranded vehicle and still cook food.  It's fairly small, but not the lightest thing out there.  It weighs 24 oz empty and gives out 7,500 Btu's of heat on high.  Tank holds .34 L and will burn for 1.5 hours.
Coleman Featherlight Exponent Stove
Here's my first stove.  It's a Coleman Dual Fuel 533.  It will burn white gas or unleaded as well, but not kerosene.  It is larger than the Exponent (above), and weighs 14.5 ounces more as well at 38.5 oz.  It has a larger tank (0.52 L) which will provide 10,500 Btu's (high) for 1.75 hours.
Coleman Dual Fuel 533 Stove
Here's my new stove (below).  I got it from THIS WEBSITE.  It's called a Biomass Wood gas Stove.  It burns wood, but has a fan run by 2 AA Batteries that allows you to burn the wood gas at a more consistent rate.  At high it gives off 10,500 Btu's and at low it gives 5,000 Btu's.  Unfortunately it's either high or low, nothing in between.  But, you don't need any gas, just batteries, and 2 AA Batteries are supposed to last 10 hours on high or 11 hours on low.
Biomass Wood Gas Stove
Let's see, compared to the stove above that would be: 10 hours/1.75 hours = 5.7, and 0.52L x 5.7 = 2.9 L of gas needed to burn for 10 hours on the Coleman Dual Fuel Stove!  Thats approximately 3 quarts of fuel, weighing a total of 6 pounds!


So, weight of Coleman Stove (38.5 oz) + weight of fuel to burn for 10 hours (6 pounds) = 8.4 pounds!
While the weight of the Wood Gas Stove is 1.6 pounds (battery and carrying bag included)!  That's 6.8 pounds less!

Plus, white gas is about $9 per gallon right now.  1 Gallon gas will burn (on high with the dual fuel stove) for approximately 13.3 hours.  While with two sets of 2-AA Batteries you can burn for 20 hours.  What do AA Batteries cost now, maybe $4 for a set of 4?  So, for the same cost as the gas ($9), you could burn your wood gas stove for approximately 40-50 HOURS (instead of 13 hours).

So, suffice it to say that I'm pretty excited about using it.  I have tried it out in the backyard and it worked great there, but I'd love to take it on a backpacking trip (I'll go on at least one this spring) and compare it side by side with the Coleman Stoves.

As I've stated in earlier posts, I like the white gas stoves because the white gas will work at lower temperatures much better than propane, or some of the other gases out there.  I've been on camping trips when people have had the butane tanks or whatever that come pre-pressurized and ready to go - simple, right?  But then some of the tanks would only use up about 1/2 of the gas.  We could tell there was more in there, but it wouldn't come out.  With white gas, you can open the lid and see how much is in there (and you know how much you put in there, you don't have to guess on your next trip how much is actually in the half used tank), and you know you can get it all out.

A word of caution:  If there is a ban on open fires in your wilderness area, you can't use the wood gas stove.  You'll have to use the Coleman stove or another of your choice.

BACK TO BACKPACKING

Saturday, March 5, 2011

365 Nights Camping?

So, my wife was emailed a link to a blog by a lady who cooked with a slow cooker each day for dinner for a year, trying out different types of recipes and stuff.
Hmm. . .  That got me thinking.  I could do that with my blog!  
I could go camping every night for a whole year, and write about my experiences!  I could try out different types of tents, pads, sleeping bags, hammocks, etc. and write about my experience with each one.

So, I asked my wife what she thought about that, and told her how excited I was about it, and well, she wasn't too excited.  She reminded me that we have 5 children and a dog (he could sleep with me though, right?), AND that we have a basement that we're trying to finish, AND that I'm studying to pass an 8 hour exam for work, AND that she and I are interviewing and writing my Grandpa's life story and we've got to get it done in the next month so that we can get it to the publishers and have it finished by his 90th Birthday in May, AND that I need to spend time with her (I just assumed that she would be camping with me for the 365 days, but I guess not), AND, AND, AND, etc.  Yeah, she keeps me grounded.

BUT, instead of doing it all in one year, I've decided to try to get to 365 days by the time I turn 40!  So, I've got less than 7 years to camp another lets see, 365 - 259 = 106 nights.  I'll just call that 16 nights per year.  So, let's see if this is doable.  This year I have planned a week long camp with High Adventure with the Varsity's and Venturers, and a week long camp with my family.  Add to that at least 6 more monthly overnighters and I'll have my 16 nights this year.  So, each year I need to go on:

  • 1 week-long camp with the scouts (5 nights)
  • 1 week-long camp with my family (5 nights)
  • 6 overnighters with the scouts (at least).  We typically do:
    • snow cave Camping in February
    • 2-night campout during spring break
    • overnighter backpacking in May
    • overnighter backpacking in June
    • overnighter in October
    • hot springs campout in November

That's 17 nights a year.  If I can keep that up, then I can cover for years where there are less camping.  Then by the time I'm 40 I will have spent 1/40th of my life's nights under the stars!  That's something to work towards!

Check out "My Camping Stats" on the upper left side of the site to see how I'm coming on my goal!

BTW, I have some campouts that I went on when I was really young, but I'm only counting campouts where I was old enough to remember.

Friday, March 4, 2011

Canyoneering

Canyoneering is AWESOME!  Especially if you're in slot canyons that require rappelling gear and wading or swimming in water!  We've done our fair share of canyons in Southern Utah.  Each one has it's own beauty, and challenges to overcome.  Some are in red rock, others in tan sandstone.  Some have bolted anchors, and for others we have to make our own anchors (that's awesome when you can make your own anchor out of what's up there, and be able to pull it all down after the last rappeller - leaving no trace!)
Canyoneering in beautiful red rock country

Most canyons have anchors bolted to the wall.  Test them before trusting them, but don't add more bolts.  Use natural anchors if there isn't a trustworthy bolt in place

Hiking canyons are fun too.  It's amazing to hike through a canyon with shear walls on either side of you!

On a hike to a canyon, I was the last in line of 10 people.  I noticed this rattlesnake just 18 inches off the trail that everyone had walked along but nobody noticed.  Keep your eyes open, most canyon territory is also rattlesnake territory

It's thrilling to set up your own anchors and set them in such a way that you can pull them down after you go down.  This one involved over 100 feet of webbing and 3 ropes, but it all came down when we pulled on it after the last rappeller.

Doesn't this look fun?   I've done it once when the water was flowing.  I'll tell you what, it was a rush to rappel down through a waterfall!

Be aware of the weather.  Flash floods can happen because of storms miles upriver of where you are.  If there's any chance of a flash flood, don't risk it.  We had just finished the canyon here, when an afternoon thundershower (with hail) hit.  It was awesome to see the waterfalls falling off the cliffs around us, but we were glad we were in a wider section of the canyon.
A quick note about Canyoneering and BSA.  In our BSA Council, you're required to do a 3 day training before you can take boys climbing and or rappelling.  Recently, they just added to that an additional 5 day training if you want to take boys canyoneering.  Which makes it so our troop can't don canyoneering trips anymore because I don't have the time to take off an additional 5 days from work so that I can get canyoneering trained (oh, and I believe the training last 2 years and then you have to renew it).

So, what happens if you have someone who hasn't ever done any rappelling or climbing, but they think the boys will like doing it.  So they (having more vacation time than me) go through the 3 day climbing training and then the 5 day canyoneering training, and then all of the sudden they are "qualified" to take boys canyoneering where they will be setting up multiple rappels, sometimes off of bolts, sometimes off of natural anchors, and each rappel needs to be set up so that the rope can be pulled down afterwards.  You don't know what you're going to encounter till you do the canyon - and even then it's constantly changing so you'll have to change your plans each time you go.  I wouldn't trust my boys with a leader who has spent only 8 days in training.  He may have training smarts, but does he have canyon smarts?

I have been climbing and rappelling since I was 14 years old.  I've been canyoneering for 10 years.  I have the experience, and the training to take scouts through canyons.  I do my studying before taking them so I know how difficult the canyon will be and what my scouts abilities are - then I don't take them through canyons they can't handle.  I've taken scouts and youth groups through dozens of canyons and so far we haven't had any casualties, or even injuries more than blisters on feet.  But, since I don't have enough vacation time to do a 5 day canyoneering training, my scouts won't be able to do anymore canyons.

Sorry, just had to vent for a bit.

Lessons Learned from Canyoneering with Scouts

Canyoneering - Lessons Learned

So, you can't do anything like canyoneering and not learn from something that either didn't go the way you had planned, or something that might have worked better if you'd tried something different.  I have a good friend that has gotten me into canyoneering, who has taught me so much about how to navigate the canyons, and safely go through them, but also about the beauty of the canyon and what you can gain from the experience.  Here's a few guidelines for canyoneering that I've learned from others, and experienced myself.
  • Don't do a canyon if you don't have AT LEAST 2 experienced canyoneering people in your group.  These people need to be experienced in setting up rappels off of bolts or natural anchors.  They need to know the knots, and the gear you're using inside and out so they can teach others and check others gear to make sure everything is ok.  According to BSA, both people need to be trained as well in their Canyon Leaders Course.

    • With 2 leaders, you can both set up rappels, send one down first (first one doesn't get a bottom belayer, so it's advisable to set up a top belay for the first one down) and then belay's everyone else that comes down.  The other leader can check and recheck all the boys equipment, and talk them down the rappel from above.  So, where the first rappeller needs to be good at rappelling and belaying, the last one needs to be rock solid sure that he sets up his equipment properly because there's nobody to check on his personal setup.
    • The last rappeller will also check to make sure that the ropes aren't twisted, and that they will come down properly after he finishes his rappel

  • NO HORSEPLAY, NO SHOWING OFF around cliffs, period.  Don't stand for it, and let the boys know that if they do, they will be sitting in the truck the rest of the time.  It only takes one time to get someone really hurt, or dead.  Take no chances!

  • If you are doing a canyon with water in it that you will be swimming through, assume it is going to be 40 degrees F.  It's typically in the shade 100% of the day, so it never gets warmed up from the sun.  If you are going to be swimming through cold water for very long, and repeatedly through the canyon, you'll want to consider wet suits.  You as a leader may have enough extra insulation to make the canyon bearable, but some of those boys with 0.001% body fat will freeze in no time at all with no way to warm up without trudging through more water to get to the end of the canyon where you can sit out in the sun and dry off.

  • Check your anchor between rappellers.  This is important if you are rappelling off a natural anchor, or one you made yourself.  One time we did a rappel that was only 15 feet, but we had to set up an anchor by burying a rock down in the sand with a rope tied to it, and then stacking rock and sand on that rock.  It was a solid anchor, but after 10 people had rappelled on it, it shifted enough that it came loose on someone when they were a couple of feet off the ground.  Luckily, nobody was hurt and we were able to set up the anchor again.  Checking the anchor between each rappel would have allowed us to find slight shifting in the rocks and enabled us to make sure the anchor was solid.

  • Don't assume someone has more experience than he actually does.  Sometimes you'll take a group and one of the boys (or leaders) will say that he's had lots of experience rappelling and can do it "with his eyes closed."  Then when you get started, you see him making simple mistakes, and unsure about himself while on the edge of the cliff.  Sure, he'll continue to say that he knows what he's doing to save face with his peers, but you need to make sure he really knows what he's doing.

  • Bring more water than you think you need, especially if your canyon involves a hike to the top of it, or back up to the top after it.  I did a canyon once with some family members and we assumed that the canyon would be wet.  Unfortunately, it wasn't wet, so as we went through the canyon we never got cooled off.  Therefore we went through more water to replace our sweat.  Add to that the fact that we went down the canyon first, and ran out of water by then end of the canyon, but still had to hike back up a different canyon to get to our vehicles, and we were in a bit of trouble.  So, those that were doing the worst stopped to rest in the shade while the rest pushed on ahead without water to get bottles of water from the vehicles for the others.  We all made it out fine, but it wasn't the way the canyon trip was supposed to go.

  • Don't assume that since you have some experience with rappelling and climbing that you can take a group of scouts through a slot canyon (even if you have taken the week long training course offered by the scout council).  Slot canyons have their own challenges and obstacles that require an experienced person to get you through.  Especially if you're taking scouts.  Go with someone who has lots of experience with canyoneering.  Learn everything you can from him on the first dozen trips or so before you call yourself a professional and able to take charge of a group of scouts.

  • With that all being said, have some fun and enjoy being somewhere that 99.99999% of the people in your area will never even dream of going.  Take the chance to enjoy the beauty around you and the amazing forces of nature that created each canyon.