Friday, February 25, 2011

50 Miler Backpacking

There’s something about going up into the mountains and carrying everything you need to survive on your back, and sleeping in a totally different place each night.  You get a sense of accomplishment that you couldn’t get anywhere else.  You feel entitled to say, “I can do it!”

We chose to do our 50 Miler up in the mountains around Kings Peak, and to bag the peak one of the days while we were there.  Plus, we had a leader with bad knees so we decided to throw in a new twist and rent a few pack goats.  You have to understand that we have a troop full of city slickers, who haven’t ever been around a farm animal.  We thought it would be a good experience for them to learn how to take care of a goat, AND we figured it would give some of the boys that get bored with hiking all day, something to do.  They can keep track of the goats and make sure they’re ok.

So we decided on this trip before Christmas, and got lists out to the parents of what their son would need for the trip.  Up until this time we really hadn’t done any backpacking, so nobody had the gear for it.  We used some of our troop funds to buy 3 good, external frame backpacks that the boys could borrow and a few good backpacking tents. 
One of our practice trips

We debated on getting the external frame or internal frame backpacks.  I know the internal frame ones are all the rage right now, but if you have one, then everything you take with you has to be more expensive, and compact to fit inside the pack.  We wanted to make this as inexpensive as possible for the families of the boys.  With external frame, they could strap a tent on the top and a sleeping bag on the bottom.  Then whatever size sleeping bag they had would work – instead of having to buy a $400 down mummy bag so it would fit in the bottom pocket of the internal frame pack.

Click on a link below to learn more about our preparations and the actual trip:


Thursday, February 24, 2011

Snow Cave Camping

Ah, the infamous snow cave campout.  You know the one.  It's the one you did as a kid where you froze your tail end off trying to warm up around a fire after getting soaked digging the cave, then retiring to the cave for bed and not believing how you could possibly stay warm in a cave made out of ICE!

Dug down to ground, now starting to dig out the cave

Entrance to a snow cave
Hard to get a picture of the inside of a cave when it's full of sleeping bags and boys
When there isn't enough snow, dig a snow trench and put the tarp over you.  You'l still stay warmer than sleeping on top of the snow


Well, I've been on 13 different snow cave campouts and have a few ideas to share about making a snow cave campout successful.  I’ve piled up snow when there was less than 2’ of snow to make a cave, and I’ve dug into over 6 feet of snow for a cave and everything in between.  I’ve slept in them when it’s been in the low 30’s, and when it’s been closer to 0 degrees F.  Here’s basically what you need to know (click on each link for more information).

Oh, and hey, the scout office likes to remind you to collapse your snow cave before you leave so nobody accidentally falls through it while snow shoeing, or skiing or snow mobiling.  So, that's a lot of fun, especially if you have a video mode on your camera!  Nobody was hurt in the making of the below video:


Below is the list we give our scouts of what to bring:


Can or 2 of beef stew
Omelet (see instructions on the right)
Sturdy water bottle (so we can add boiling water and put it in your sleeping bag-Nalgene type works best)
Two Complete changes of clothes
Waterproof clothing (where possible)
Warm Coat
2 Pairs Warm gloves (or more)
Wool/thick socks
Lots of layers of clothing
Hood/cap
Tarp
Hand/feet warmers
Flashlight / Headlamp
Sturdy Snow Shovel
Small digging shovel
Warm sleeping bag (or 2 stuffed together)                   
Foam pad
We will provide bowls, spoons, & cups
Warm Boots (or 2 pairs if needed)
Candy Bars (works great to warm you up)
Any snacks you want – but don’t get carried away.
Any required medications – see parent permission slip


Want to download a word document of the permission slip we use?
CLICK HERE

    Backpacking - Lessons Learned

    So, you have to learn something on every trip, right?  What have I learned about backpacking through the years?  Well, there's been a few things - some I've learned, some I've learned by watching others.

    Don't always ignore your pain


    When I was growing up, my brother and I tried to conquer pain.  We thought that if we could ignore all pain, then we could get through any type of physical challenge just fine.  That worked pretty good in Track and Field, and in Wrestling, and quite frankly in a lot of things we've done since.  BUT it's not always the best policy for backpacking.

    To some degree you have to ignore pain while backpacking.  The packs aren't totally comfortable, you get rub spots and your back, shoulders and hips hurt, and you get tired.  But, if you're on a 50 miler, you need to pay attention to your FEET.  I started out just ignoring the fact that I was getting a hot spot in my foot, and I was able to do that just fine.  But then at the end of the day I had blisters on my feet that I wouldn't have had if I had just stopped for a minute and taken care of my feet.  Instead, I have blisters that I have to deal with for the next 40 miles!  Don't ignore your feet!  AND Try to get the boys to do the same and you'll all have a much better trip!
    Duct tape works, but it's so much better without the blisters in the first place!

    A hike like this is so much better when you're feet aren't in pain

    Pack Light


    I've always had more than I needed on a backpacking trip.  Part of the problem is that I bring extra in case anyone forgets something or something happens to them or their gear.  The other part is I have ingrained in my soul "BE PREPARED".  Be prepared for what?  For anything that might come along.  I'm the kind of guy that always has bandaids in my wallet for when my kids need one.

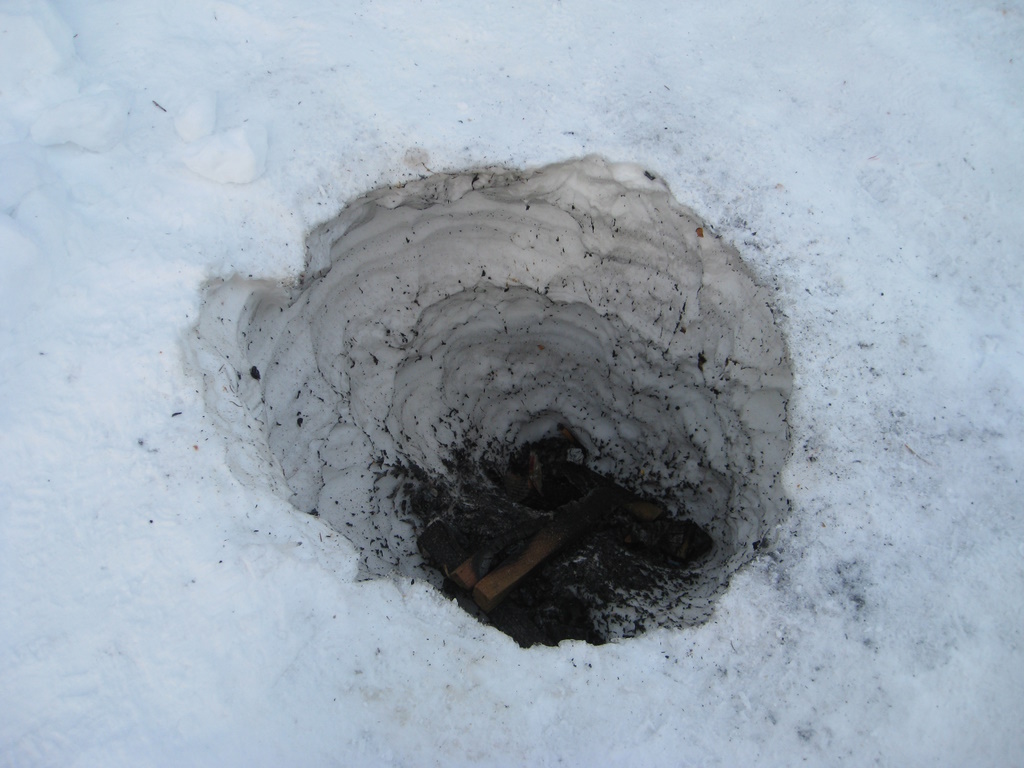
    So I take matches and a lighter, and a few other ways of starting fire, just in case those two get lost or don't work.  I have an extra pair of pants and shirt at the bottom of my pack that I've never taken out yet, but, you never know when you might need it.  I have an extra survival kit that's all packed up together that I take along with stuff that I already have in my pack, but this is all in one package so I can throw it in my day pack if we're going on a day hike (and in that survival kit I have 2 or 3 different ways of starting fires as well!)

    What can you see in the video below that probably wasn't necessary for an over nighter camping trip?

    When we're just going on an overnighter backpacking trip, and I know the boys that are coming have some experience in what we're doing, I can get my pack down to about 15-20 pounds.  But on a 50 miler where we'll be at least 10 miles from the trucks (and 20 miles at most), I'll just carry the 50 pound pack and hope my physical condition is sufficient to handle it.  So far I'm still fairly young and in good shape (I'm in the low 30's).  But I know that I'll get to the point where I can't handle a 50 pound pack for 50 miles, then what?

    Then I'll have to trust in the gear I have, and the experience I have to get through whatever I face.  I'll have to trust the boys (which means going through packs and making sure they have what they need sometimes) and not bring extras for them - they can survive an overnigher unprepared, it'll just help them to be prepared for the next trip.  I'll need to be experienced enough that I know what will and what won't work for all my gear (tents, water filters, stoves, fire starters, etc) so I don't have to bring up extra equipment.  I'll need to know exactly what I will need to eat on a trip to keep me full of energy, but not bring so much that I'm bringing home food afterwards.

    Stick to your Hiking Pace


    Everyone has a pace where they can walk for miles and not get tired (well, most people).  Find that pace and try to stick to it.  It's difficult when you have a group of boys and adults that all have different paces.  You can try to make everyone slow down to the slowest pace but that has 2 problems.
    1. Sometimes the slowest person just likes to be in the back.  I've been walking with people before that have this inner need that they probably don't even recognize to be behind in the group.  No matter how much you slow down to include them, they just slow down further to stay behind.  I've been biking with someone with that mentality.  I slowed down so much that I could walk faster and yet still he stayed a ways behind me.
    2. If you go slower than "your pace", you'll use more energy.  Your body has a speed in which it can keep going for long distances quite efficiently and when you deviate from that pace it throws you off.  Yes, going slower can actually use more energy than going at your pace - AND you get there later as well!
    I've tried and tried to keep groups together on long hikes and it never works.  So I've come to the conclusion that when possible, it can work to split up into 2 groups if they are too much different in paces.  The problem is that then it's nice to have 2 leaders with each group which means more leaders.  But I have had times when we had a boy and a leader that were worn completely out, and we were running out of daylight.  We still needed to get a ways down the trail to where we were going to camp.  So I took some of the fast boys along with me and climbed up a big incline in the trail, then we dropped our packs and went back to help the others.  It worked out pretty good because they all got to hike at their pace, and they got to help each other make it.

    Another thing, if you get bored hiking, grab a walking stick.  It will give your hands something to do, and you can focus on the walking stick instead of the monotony.  Lord Baden Powell (founder of scouting) said that if you use a walking stick, the miles will fly by.  It really works!  Give it a try!

    BACK

    Wednesday, February 23, 2011

    Snow Cave Camping Lessons Learned

    Needless to say, I've learned a few things about snow cave and winter camping.  Below are a few of the things I've learned:

    • If you are going to be hiking at all to where you will be camping, get some cheap plastic sleds that you can strap things to, with a pull rope on it.  Then bring a backpack with most of your personal gear, and load the sled with your stove, water, fuel, firewood, kitchen box etc.  Then, if you have time you can hike up the hill and sled down for fun!

    Sleds make it easy to haul up gear to your site

    • We've sometimes been able to connect caves together with tunnels in the morning after we got up, but one year we connected them together before we went to bed, thinking it would be cool to be able to talk to each other through them.  Well, we learned a few things:
      • Snow absorbs so much sound that we couldn't really hear anything in the neighboring cave, so we didn't end up visiting at all
      • I was in the cave that was lower (in elevation) than the other cave.  The guy that was with me was sleeping right below the tunnel connecting us to the upper cave.  Well, all the cold air from their cave rushed down through our tunnel, past him and out our door, giving him a cold breeze on him all night.  It would have been warmer for him without the connecting tunnel.

    Connecting the caves (3 connected in this case) is fun, but wait till after you wake up to do it

    • If the snow is powdery, you'll need to pack it down before you start digging.  In the picture below, we piled up the snow but didn't pack it down and it collapsed twice while digging it.  We ended up just digging a trench and sleeping in it instead of a cave.  We were still warm, but it wasn't the same.

    Pack the snow if it's powdery or it'll collapse while you're digging it out

    • Feed scoops from IFA and Avalanche Shovels work great in different types of snow.  Other things that work great are regular or square nosed shovels that have the handles cut down to about 12-18".  

    Feed Scoop and an Avalanche Shovel

    • Shovels to scoop out the snow and throw it away (or to the top of the cave) need to be "scooping" shovels, not "pushing" snow shovels.  Some snow shovels work great for pushing snow off the driveway, but you can't really scoop it up and throw the snow with it.  Those won't work too great when you're trying to throw the snow out of a hole 5 feet deep in the snow.

    A "pushing" shovel
    Scooping shovels work better for scooping up snow and throwing it away
    • Use a plastic box for your food and utensils and stuff (cardboard just get's wet and weak).  Then carve out a kitchen in the snow.  You can make shelves for your stove and food box, a serving table, or whatever you want.  No sense cooking with your stove on the ground just because you don't have a table.
    Make your own kitchen
    • If you start a fire on top of the snow, it will slowly sink down into the snow and soon the fire will be 4 feet down in a hole and the only way to get warm will be to stand directly over the fire in the smoke.  But if you dig down to the ground and dig around so you can be down by the fire, you can be around the fire and stay warm.  If you only have a few people, you can dig out one side around the fire and let the snow wall on the other side reflect the heat back to you.  If you have a big group, dig out all around the fireplace so everyone can get around it.
    Fires started on the snow will sink down till they are useless for heat
    For just a few people, dig out one side and let the snow wall reflect the heat back to you.  This also will allow the smoke to go straight up and away from you.

    If you have lots of people, dig all round the fire so more people can be near the fire.  Then you can cut seats and stuff into the snow - sit on a piece of wood, or plastic to keep your backside dry

    •  It's amazing how much a candy bar can do to help you warm up, have energy, and raise your spirits.  Keep some candy bars in your pack to eat when you get cold or tired.  When you pack, think about how each candy bar will be when frozen.  Carmel candy bars freeze so hard that they're hard to eat.  I prefer peanut butter and chocolate candy bars because they give sugar and protein.
    • Keep your spirits up.  If you know that you have a plan, you will be more able to be optimistic and keep the boys busy.  If you're busy, you feel better, and you'll stay warmer

    Sunday, February 20, 2011

    Hammock Camping

    I hadn't really ever planned on doing any hammock camping because I've never seen any that would keep the bugs off, and the rain off.  I've only seen the ones that you get into from the top and lay in.  Then one of my friends bought a couple of good hammocks for a really good deal and let me try one on a trip.  It had it's benefits:

    • you don't need to search for a flat place to sleep, or an area free of rocks (hard to find in some areas). All you need is two things to tie off to, whether they be rocks, trees, or whatever.
    • It's fairly lightweight, no tent poles to take, no tarp necessary
    • It's quite relaxing to be rocked to sleep by the wind.
    • Hammock's like those in the pictures below, come with rain fly's that keep you dry, but allow you to see out still, they also are easy to get in and out of. 
    • No sleeping pad required unless it's cold and you need to insulate from the cold.

    Hammock camping in Uintah's on rocky ground
    Hammock Camping on a slope below Kings Peak
    There are some challenges with hammock camping though:

    • It's hard to stay warm in a hammock.  Your sleeping bag gets compressed on the bottom, and leaves you with no insulation below you which makes for a cold night.
    • The hammock's in the photos above have an opening on the bottom of the hammock where you climb in then when you lay back, the opening closes with velcro.  Then you need to get into your sleeping bag while rocking back and forth in the confined hammock.
    • It would be good to bring a small tarp to set your stuff on, and stand on while you're getting in and out of the hammock - by small I mean it could be just a 4'x3' tarp
    To solve the problem with the cold below you, we used thin pads, or even those foam, insulated, accordion type shades for truck windows.  If you slept on top of the pad, it was enough to stop the wind from freezing you from below, but it was hard to get in the hammock from below, get into your sleeping bag and then get the pad underneath you, and then keep it underneath you while you sleep (I roll a lot while I sleep).
    Even goats like hammocks (well, the shade they provide anyway)

    The hammocks we used were Hennessy Hammocks.  They were really well built, and I wish I had one for myself to experiment more with.  I know of some scout troops that buy hammocks instead of tents and all sleep in hammocks on their campouts.  CLICK HERE for more information on Hennessy  Hammocks.

    All in all, it was a good experience.  I enjoyed sleeping in the hammocks, but at the same time, if it were bad weather for extended periods of time, you'd be stuck in your hammock all by yourself instead of in a tent with another person or two to talk to.

    Put the "Outing" in "Scouting"

    What's one of the big differences between boys of today, and boys of 50 years ago?  Boys today have so many distractions (video games, internet, music, etc.) that they don't ever get away to spend time in the outdoors.  I believe that we are losing a very important part of what makes boys Men.

    It's the computer games and online socializing and texting that is raising our boys right now.  How would it be if instead, our boys were looking for opportunities to be outside, and ways to challenge themselves?  A little "boy against nature" is a great way for a boy to learn more about himself, and to develop skills that could really help him in the future.
    Go out and go backpacking.  It's fun, and it'll get you away from the city.

    I know that not all scout troops are like this, but I have been blessed to work with a troop that has figured this out.  They CRAVE challenging activities where they can get away from the city, and put themselves up against the worst mother nature has to offer, or the most difficult hikes/climbs/canyons that are out there.  Why do they feel this innate desire to do this?  It's because that's who we are as males.  We each feel in our own way that we need to conquer something, so master a skill or talent, to perfect our ability to do something.  To prove to ourselves that whatever we're put up against, we can come out on top.  Not by pushing others beneath us, but by working together with people around us and with objects that are at our disposal.
    Camping anywhere is worth it, even if it's just a plain, flat area.  We played capture the flag at night with glow sticks for hours!

    Who cares what tent you have, a $30 Walmart special like the one in front, or a HUGE 12 man tent like the one in back

    As we prepared for our wilderness survival trip, I would pick random times in our activities and camps to stop everyone and give them a scenario such as:
    Ok, I've got some bad news.  We're not going to make it back to the vehicles before night and we need to set up camp here.  What do you have with you that will help us survive the night.  
    At first they would all groan a bit, but then we would go through our pockets to see what we have that's worth anything.  Depending on where we were we would then build a fire with whatever we had, or find shelter, find water, verify if there is any edible plant life or animal life around, and how we could catch the animals.  It really made them think about their surroundings, and try to be prepared for anything that comes along.  They worked together to devise ways to survive as a group, sharing their resources. By the end of the activity they were excited that they had a plan and would be able to survive.  They learned from each other and decided on things they would take with them on ANY hiking/camping trip.
    Just find a trail and start hiking - see where it goes

    So, what does this have to do with the title of this post?  I've heard and I'm sure you've heard the phrase before:
    3/4 of "Scouting" is "Outing"
    What does that mean?  It means that you need to get the boy outdoors.  I believe there are many parts of scouting that are inspired by God.  One of those is getting the boys outdoors.  There's something a boy learns about himself when he's outdoors that he doesn't learn anywhere else.  And on campouts and trips is sometimes the best time to have discussions about their lives, where they're going in life, what they want to do and what they need to do to do it.  You can't help but think about your future, and your past as you sit around the campfire, staring out on all the stars, contemplating God's role in all this.  Don't be afraid to discuss God on your campouts, He is the Creator of all that you're enjoying out there.  It gives the boys the sense that they're not alone.  Someone up there cares about them and wants them to be happy and succeed.
    Take time to point out the wildlife, and teach respect for the animals around you
    Campouts will be more physically draining than almost anything some boys do.  But, that's satisfying to them at the end of the day, it fulfils their inner desire to be productive, to actually live, not sit behind a computer/tv screen and watch someone else's adventures.
    Enjoy and point out the beauty around you
    If you can get the boys outdoors, they'll be surprised how much they love it, and need it.  I know a Venturer Leader in another troop. When he started serving as the leader, the boys weren't interested in scouting, or camping or doing anything outdoors unless it involved snowmobiles, 4-wheelers, or jet ski's.  It took him a couple years of going on campouts with very few boys at first, but each time they came back and excited others with their experiences.  Eventually they got to where they look forward to canyoneering activities, and one year they made their own kayak's and kayaked on Lake Powell for their High Adventure, exploring canyons and such down there!

    Thursday, February 17, 2011

    Challenging Boys helps them become Men

    I know lots of people don't see the need to go on trips that challenge boys.  As someone I know says, 
    "I'm not totally convinced that young men need to go rapelling in order to become MEN (you could replace rapelling with snow caving, canyoneering, backpacking, etc.)"
    Here's Lion's Head, it's a 300 foot cliff we were training to be able to rappel down
    Here's one of our leaders rapelling off Lion's Head.  It's good to challenge and stretch us adults too.
    To that I say that the video games sure aren't doing the job - young men who only play video games turn into 26 year old's that live in their parent's basement, without a job, and just play video games all day.  Scouts need something that will challenge them and allow them to see that they can do hard things.  They like to test their mettle and to come out victorious, or to come out with a plan to do better next time.  We don't need to take it easy on the boys, afraid that if they fail in something in scouting then they'll be failures for life.  If taught right, when they fail in something in scouting they will try to figure out why, and then try again until they succeed.
    View from the top of Kings Peak.  This was part of our 50 miler, and it challenged boys and men alike
    That's one of the problems with the way people raise kids these days.  They think that if they insulate them from failure then they'll never know what it's like to fail.  When in reality, we as adults fail sometimes on a daily basis!  We have projects at work that don't always work out right, so we change our attack procedures and try to do better.
    Proof that we made it the 50 miles
    We're raising a bunch of boys to be adults (notice I didn't say MEN) that will fear failure.  They will be unable to handle failure or know what to do when they are confronted with it, so they don't take on challenging tasks in the fear that they won't succeed.
    Sometimes this may be you, you'll be thinking "Why even try, it's not going to make a difference!"  But just keep going and have faith.  It'll all work out, and you'll make a difference in the life of some boys.

    When what we need are MEN who are willing and eager to step up to the plate and take on whatever challenges come their way.  MEN who are willing to go out and find work, whatever it is, so that they can support a family so that their wife can stay home and help teach their children these things.

    The schools aren't teaching them, sports for kids aren't teaching them.  They're teaching kids that we don't need to keep score because it's only important that everyone has "fun".  How about we teach them to do their best while they're having fun?  And then give them a way to measure how good they've done!  That way they can know if they need to work harder next time, or what they may need to do differently next time to be able to win, or score more points, or block more goals, or whatever they're doing.
    Men are resourceful.  They make whatever cards they're dealt work out just fine.  Just like with this broken spoon
    I've found in my time working with the scouts that most boys want to be challenged.  They want to work hard at something and then finish with the feeling that only comes when they have done their best.  They want to be stretched and then look back and say "You know, that was hard, but I did it!"  Lets give them the opportunity to be challenged, and to succeed!

    Sunday, February 13, 2011

    50 Miler, Practice Trips

    We went to a free class at REI about backpacking, and discussed ways that we could feasibly cut down on the weight of our packs.  Then we went on 3 over-nighter backpacking trips to get a feel for what they needed and didn’t need to bring, and how much weight they could handle.  The requirement was that you had to go on at least one of these practice trips if you wanted to go on the 50 miler.  We didn’t want someone going to the 50 miler with no experience beforehand that would slow down the entire troop. 

    All of us started out with a lot heavier packs on the first trip than the 3rd trip.  We learned what we did and didn’t need pretty quickly.  It was almost comical to see the quantity of stuff that was taken on the earlier trips.  Check out this video I took as I hiked behind a father that came with us on a trip.


    Pretty funny, until you realize that all that extra weight and the swinging back and forth of all the loose gear really slowed him down.  He packed a 100 foot rope, and his sleeping bag kept falling off his pack.  This trip we backpacked in 4 miles and the whole time we were hiking up a steep incline.  He was so worn out that I had to take some of the boys on ahead and then come back to get his pack to take it with us so he could hike without it.  He didn’t end up going on the 50 miler, but the boys learned from his experience and made sure their stuff was strapped down tight, and that they didn’t have an ounce of weight that they didn’t need.

    BACK

    50 Miler, Pack Goats

    We rented our goats from a guy out in Tooele, Utah.  He raised the goats to be pack goats, and he gives discounts to Boy Scout troops. 

    Go to http://www.highuintapackgoats.com/ to learn more about goats and his company.  These aren’t little goats, they’re pretty big, and have huge horns that sometimes spread 3 feet across!  They can carry approximately 30 pounds each!
    Pack goats with Kings Peak in the background

    We needed to go on a training trip with the goats to learn how to take care of them, and learn from the owner what to do in case of emergency or whatever else we might encounter.  Here’s some of the things we learned:
    •         Goats love people.  We didn’t use leashes except to tie them up at night.  The followed us everywhere we went just because they want to be with us.  BUT, sometimes they will follow others you come to along the trail, so you may need to pull out the leash and keep them with you till you’re out of sight of others.
    •          Horses are terrified of goats.  No idea why, but if you come upon a horse, it’s your duty to take the goats off the trail and let the horses pass.  We passed some pack horses once, and we did as we were told, but you could see in the horses’ eyes that they were terrified.  The way they walked almost sideways so they could watch the goats the whole time and slowly came up to us then rushed away.
    •          Goats can graze along the trail, and at camp each day, but they also need some grain food each morning and night.  So, one of the goats carries the grain for them all for the week.
    •          Goats need Vitamin B tablets each day to keep them from going into shock.  They don’t handle stress very well and once they go into shock, they’re dead within 24 hours.  So, we put a vitamin B pill in with a handful of grain and then let the goat eat out of our hands each morning and night.

    •          The only time we tied up the goats was for the night.  They stayed untied and hung around us until we were ready for bed then we tied them up where they could eat some more grass for the night.  So that means they were wandering around camp the whole time we were cooking and eating and resting.  At first I thought they would wander, or be annoyingly close the whole time, but they were good at staying within 50 feet or less of the camp, and we only had one named “Oreo” who tried to get into stuff.  Twice he got into someone’s pack and stole a granola bar once, and a bag of trail mix another time.

    •          You’d think that having goats with you would lure bears to the fresh meat, but just the opposite was true.  Each of the goats has a bell on his collar.  They like to hear each other and stay together, and it helps us to know where they are.  The bells also make more noise to keep the bears away.  You get used to hearing bells while you hike.
    "OREO"  All ready to go
    In all reality, having goats just meant that we brought along more stuff than we needed, but it was the experience we were after.  We wanted the boys to get the chance to take care of a pack animal.  They’re not farm boys, they don’t do that kind of stuff usually.

    On our training trip they were terrified of the goats because they were somewhat skittish, and when someone hiked by with some dogs, the dogs chased the goats, and the goats tried to hide behind us for protection.  

    That meant that the goats with 3 foot horn spans were running around us and the boys were sure we were going to get gored to death!  Pack goats don’t have soft hair, they have rough, thick hair.  AND they kind of stink.  So none of the boys were too excited about getting too close to the goats.
    "TETHY'S" They like to roam around camp and come see you once in a while

    But by the end of the 50 miles, the boys were hugging the goats, laying down with them to rest during the day, and loving each one for their own personalities.

    Each person still brought their pack and carried almost all of their stuff.  The goats pretty much carried a couple of tents and some water and that was it.

    BACK

    50 Miler, Backpacking Foods and Cooking

    In the past, I’ve always done things like oatmeal for breakfast, and for dinner we would pre-dry some hamburger to go with hamburger helper meals and lipton noodle meals.  That way they were cheap, and lightweight.  This time we decided to simplify and try some of the pre-prepared freeze-dried meals.  They were expensive, but they were pretty easy to cook and prepare, and they were very lightweight.
    Only brought one spoon?  It's ok, you can fix it

    For low budget meals, try hamburger helper.  You usually just need to add water and hamburger and then boil it.  So, try cooking the hamburger before you go, and then drying it on a food dehydrator.  That way you don’t need to refrigerate it, and it will be as lightweight as the freeze dried foods.

    For breakfasts, you can’t go wrong with instant oatmeal packets, but if you want to add some variety, there’s also instant cream of wheat packs, and instant grits packs.  Then you can just boil some water and add it to your oats (or whatever) in your bowl and eat it.

    Lunches are always hard because your usually hiking during lunch, and you don’t want to stop and set up a kitchen.  We typically bring granola bars, jerky, trail mix, and I’ve found that string cheese will stay good for the whole week in your pack.  One time we brought a “yard of beef”, it was actually only about 18 inches, but it was a summer sausage.  It added 3 pounds of meat to someone’s pack, but it was good when we brought it out part way through the week!

    I know everyone thinks they need one of those fancy mess kits to eat with and cook with – you know, the aluminum ones like the ones your father had when he was a kid?  I like to go to All-A-Dollar and buy a cheap Tupperware type bowl and cup and plastic spoon.  I’ve found that you rarely need a plate on a backpacking trip.  Then I’ve got a lightweight “mess kit”, that won’t burn my fingers as I try to hold the bowl with hot food in it like an aluminum bowl would.

    I have one, 2 liter pot with a lid that’s aluminum.  I use that for anything while backpacking.  Most foods only require heating up water so it’s perfect for that.  If you will be able to catch fish and are planning on eating them, bring a small frying pan as well, or if you can have fires, bring some aluminum foil and cook in the fire.

    I like the "old fashioned" coleman backpacking stoves that run off of white gas.  They have them out now that run unleaded fuel, white gas, or kerosene as well.  They work at low temperatures, and you can see how much fuel you have available.

    BACK

    50 Miler, The Actual Trip

    So, when all was said and done, we had 4 leaders and 8 boys on the trip.  We had one other leader who wanted to come, but since he hadn't gone on any of the practice trips, AND he has bad knees, I told him we couldn't take him.  We were planning on backpacking 50 miles in 6 days and we needed people in our group that had some experience and could make it.  If his knees gave out part way through the trip we'd be in trouble.

    We planned on getting 3 goats, but when we went to pick them up, we were told that we could have 5 for the price of 3 because the other 2 needed some exercise.  The names of the goats we took were: Oreo, Tethys, Buck, Eclipse, and Telesto.  Below is a photo of Tethy's and Buck loaded up with their packs, with Kings Peak in the background:

    Tethy's and Buck
    So, we were told to not worry about the goats keeping up with us, because they'll do better than us.  Unfortunately, that wasn't totally true.  On the first day we hiked 12 miles and totally wore out the goats!  They got to where they would just lay down any time we stopped for a breather, and it was hard to get them going again.  So, we probably should have eased them into the trip I guess with a little less mileage the first day.  Below is a photo of Red Castle:

    Red Castle
    Other than that, the goats did fine on the trip.  We didn't end up taking them all the way to the top of Kings Peak because we didn't want them to get hurt boulder hopping - though their owner said that they've done it before.  So we hiked up to the base of the boulder hopping part and tied them off with some food and water while we bagged the peak and hiked back down.
    Oreo

    We ended up with way more food than we needed, and ended up taking home a bunch of food with us.  But one of the best things we did was to make a bunch of jello and put it in a gallon zip lock bag in a snow pile to cool.  We ate the jello after coming back from bagging Kings Peak, and it was so good!  It was a cold, sweet treat that you don't get usually when you're backpacking!  I made 4 packs of jello and probably could have made twice that much and still eaten it all.


    High Uintah's
    We ended up doing a loop.  The first day we hiked to Red Castle Lake (long day), then we hiked over towards the trail to Kings Peak in the next 2 days, then we hiked Kings on Thursday, and then worked our way back to the vehicles.  It was fun because it wasn't just a straight in and straight out hike, we got to see different scenery almost every day.

    We brought water filters, and iodine tablets.  Good thing too, because our filters got so clogged that we ended up using the iodine.  Unfortunately, one of the bottles that we got out of the stream to put iodine in, didn't ever get the iodine in it, and one of our leaders drank it.  Fortunately he didn't suffer any ill effects till a week or so after our trip, so he was somewhere he could get help.  He said it was horrible though.  He wanted to die - so try to be good about getting everything filtered and sanitized.

    We had 3 filters, next time we should probably bring up a filter for every 2 people, AND the iodine tablets as backup.

    We caught a couple of fish, but never did get very many because we were pretty tired by the end of the day of hiking and taking down and setting up camp.  We did however hike over to a waterfall for a shower twice. It was freezing cold water, but it was so refreshing!  It would be good to take some Croc's or some type of lightweight shoes/flip flops to wear around camp and in the shower.

    The mosquitoes were horrible! Check out this photo of the mosquitoes in the air:
    Mosquitoes near Red Castle
    BACK

    Thursday, February 10, 2011

    Shovels for Snow Caves

    • Shovels - you'll need 2 basic types, something to dig with inside the cave, and something to scoop out all the loose snow from the entrance to the cave

      • Small shovel to use in the cave.  It's small in there so you don't want anything huge.  A few options are:

        • Metal Feed Scoop from IFA works great for digging out chunks of snow and then tossing them out the entrance ($8)

        • Avalanche Shovel  works good for cutting through layers of ice and such (recreation outlet has these for $20)

        • Hand Saw can be used to cut out blocks of snow, then use a sturdy small shovel to pop them out of the wall

        • I've never seen an emergency folding shovel that has held up to digging a snow cave - I've seen a lot of them break though

          IFA Feed Scoop on the left, and an "Avalanche Shovel" on the right.  Both are good for snow caving.
    • You'll also need a large shovel to scoop out the loose stuff from inside the cave and throw it out.  We typically use a regular snow shovel, but be careful and only use it for scooping and throwing, not prying because we’ve broken countless shovels through the years.

      Sleeping in your Snow Cave

      Setting up your sleeping area right is almost as important as how you dig your cave.  You need to be able to get in there and change and go to sleep without getting wet.  You need to sleep up off the ground to keep you insulated from the snow below you too.  Here’s some hints that may help you sleep soundly and warmly.
      • A tarp goes on the ground first when you're setting up your sleeping area to keep you and your gear dry.  Some people like a tarp above them as well to stop the drips from getting them wet all night.  If you round out your cave you won't have to worry about that as much, but it's hard to get it perfectly smoothed off so you’ll have to experiment.

      • You'll need a sleeping pad to insulate you from the ground.  I prefer a 3" foam pad, but I know that therm-a-rests and others like that work good too.

      Sleeping bags - don't always trust the temperature rating.  I've been in 0 Degree bags in 40 degree weather and been cold before.  Get a feel for your bag before going.  If in doubt, stuff a smaller bag inside another bag.  Plan on the cave being about 35 degrees.  I’ve slept in a $20 Walmart sleeping bag with a fleece sleeping bag liner stuffed inside and been just fine.


      BACK

      Surviving the Night in a Snow Cave

      • Bring a complete change of clothes.  You'll need to change out of your wet clothing completely before going to sleep.  If you put your snow pants and coat under your sleeping bag they won't freeze and you can wear them again the next morning.

      • Believe me, your cave is warmer than outside.  If you're cold, get inside and get changed to dry clothing and you'll feel 100% warmer!  I’ve been on camps where I’ve spent over an hour convincing a boys that they're going to freeze to death if they don’t get into the cave – but it didn’t make sense to them that if they climbed into a cave of ice, they would get warmer.  Once I finally got them to go inside and change out of their wet clothing, they warmed up almost immediately.

      • Nalgene type water bottles can be filled with boiling water and stuffed into the bottom of your sleeping bag.  It will warm up your bag before you even get into it, and keep your feet warm all night.

      • If you’re one of those who needs to go to the bathroom multiple times in the night, you have 3 options:

        • Get out of your warm sleeping bag, put on your snow pants and coat and boots and slither out your snow cave to write your name out there, or

        • Bring a “special” bottle to bed with you that you can open up and fill up with some nice warm fluids when you’ve got to go – just make sure the cap screws on tightly and it’s labeled properly, or

        • Roll over in bed so you’re facing the cave wall, unzip your sleeping bag half way and sign your name on the inside of the cave – just make sure you don’t have the tarp wrapped around you at the time.